
Last updated October 17, 2026
 Metal roofing
 Architectural shingles
 Tile roofing
 GAF
GAF Owens Corning
 Flat & low-slope
Free roof inspection with deck photos before we talk money - GAF and Owens Corning certified installation
Roofing Warning Signs: A San Jose Homeowner’s Reference Guide
A dark stain spreading across your ceiling and a subtle dip in your roofline are both called “warning signs” in the roofing trade, but treating them the same way is a $10,000 mistake. One gives you weeks to plan a measured repair. The other means water is already pooling against your decking, soaking into framing, and quietly compromising the structure above your head. This guide-along with our Complete Guide to Roofing in San Jose-sorts the signals every San Jose homeowner should watch for into three tiers: what you can monitor, what deserves a call this month, and what needs someone on the roof today. By the time you finish, you’ll know which signs matter, which ones don’t, and how to document what you’re seeing so a contractor or insurer takes it seriously.
Styles & brands we work with
Quick Answer
The roofing warning signs that matter most for San Jose homeowners fall into three tiers: cosmetic indicators you can monitor (granule loss, minor moss, first-coat oxidation), functional failures you should schedule within 30 days (cracked flashing, missing shingles, attic condensation), and structural signals requiring immediate contact (sagging decking, interior water flow, pronounced ridge line dip). If water has reached the interior, call a roof repair specialist in San Jose before the next rain event, because what you can see from inside is usually worse by the time you’re seeing it.
Table of Contents
- The Three-Tier Urgency System: How to Read Your Roof’s Signals
- Tier 1: Cosmetic Indicators to Monitor, Not Panic Over
- Tier 2: Functional Failures to Schedule Within 30 Days
- Tier 3: Structural Signals That Require a Call Today
- San Jose-Specific Warning Signs Most Guides Miss
- Interior Warning Signs That Appear Before Ceiling Stains
- How to Document Roof Warning Signs for Insurance and Estimates
- Signs Contractors Sometimes Use to Oversell
- Common Mistakes to Avoid
- When to Call a Professional
- Frequently Asked Questions
- The Bottom Line
The Three-Tier Urgency System: How to Read Your Roof’s Signals
Most warning sign lists dump every symptom into a single column and call it a day. That’s why one San Jose homeowner is up on a ladder with a caulk gun at midnight while another is watching a sagging deck line from the couch, waiting for a “good time” to call someone. Neither response fits the problem. The signal has urgency built into it, and your job is to read it correctly.
Here’s the framework we use when we walk a roof in the San Jose area:
- Tier 1: Cosmetic indicators. These are signs of normal aging that affect appearance or shorten remaining lifespan but do not currently threaten the structure or the interior. Granule loss, minor moss, first-coat oxidation, slight color fading. You can monitor these. Document them annually. Address them when you’re already planning maintenance.
- Tier 2: Functional failures. These are components no longer doing their job, but the failure hasn’t yet opened a path for water into the structure. Cracked flashing, a missing shingle, lifted ridge caps, failing caulk around a vent pipe. These typically give you a window of 30 days or so before the next step. Schedule a repair this month. In San Jose’s wet season (roughly November through March), that window shrinks considerably.
- Tier 3: Structural signals. These are signs that water is actively entering the roof system or the load path has been compromised. Sagging decking, interior water flow, pronounced ridge line dip, rafter staining. These demand contact today, not because we want to alarm you, but because the damage compounds quickly once it reaches this stage. A $400 flashing repair becomes a $6,000 decking and insulation replacement in a matter of weeks.
The rest of this guide walks through each tier in detail, plus the San Jose-specific and interior signs that most homeowner checklists skip entirely. For year-round maintenance timing, see our Seasonal Roofing Care for San Jose: Year-Round Homeowner’s Guide.
Tier 1: Cosmetic Indicators to Monitor, Not Panic Over
Some roofing “warning signs” are simply what an aging roof looks like. Recognizing them spares you from unnecessary panic and from paying for repairs you don’t need yet.
Granule Loss on Asphalt Shingles
Asphalt shingles shed granules from day one. That’s the design working: the granules protect the asphalt from UV radiation, and the shingle sheds surface material as it wears. Walking down your gutter line after a dry San Jose summer and seeing a light coating of granules along the downspout outlet is normal. What’s not normal: granules so thick along the gutter line that you can scoop them with a dustpan, bald patches on the shingle face where the asphalt is visibly exposed, or a uniform layer of granules spreading across the lawn below the drip edge. That’s not wear. That’s a shingle batch reaching the end of its service life. It’s a monitor-and-plan signal, not an emergency call.
Minor Moss on North-Facing Slopes
Moss on a San Jose roof is rare compared to coastal cities like Santa Cruz or Half Moon Bay, but shaded north-facing planes, especially in the foothill neighborhoods around Almaden and the eastern edges up toward Mount Hamilton, can develop patchy moss after a wet winter. A few isolated patches along the edges or in the shade of a chimney are cosmetic. Moss holds moisture against the shingle surface and can lift shingle tabs over time, but a small patch developing over one winter is not a structural emergency. Brush it off gently if you can access it safely, note it in your maintenance log, and monitor it through the next wet season. If it doubles in coverage within a year, it’s a drainage or shade issue worth fixing before the moss starts working under shingle tabs.
First-Coat Oxidation and Surface Streaking
On metal roofs, particularly standing seam or steel panel roofs found on mid-century San Jose homes, the paint system oxidizes with age. You’ll see chalky residue on your fingers if you wipe the surface, or faint streaking where the original color has gone matte. This is cosmetic. The structural integrity of the metal is intact. The roof is still shedding water. What the oxidation does signal is that the paint system has reached its functional limit, which means the metal will eventually need recoating or replacement. You have years, not weeks, to plan for that expense. If you’re seeing rust, that’s a different conversation, and it belongs in Tier 2.
Tier 2: Functional Failures to Schedule Within 30 Days
A functional failure means a specific component has stopped doing its job. Water hasn’t entered the structure yet, but the barrier has a hole in it. In San Jose’s climate, with its long dry summers and concentrated winter rainfall, you may not notice a functional failure until the first storm hits. That’s why the 30-day window matters: you have a workable window to fix the problem before the next rain event turns a component failure into an interior water intrusion.
Cracked, Lifted, or Separated Flashing
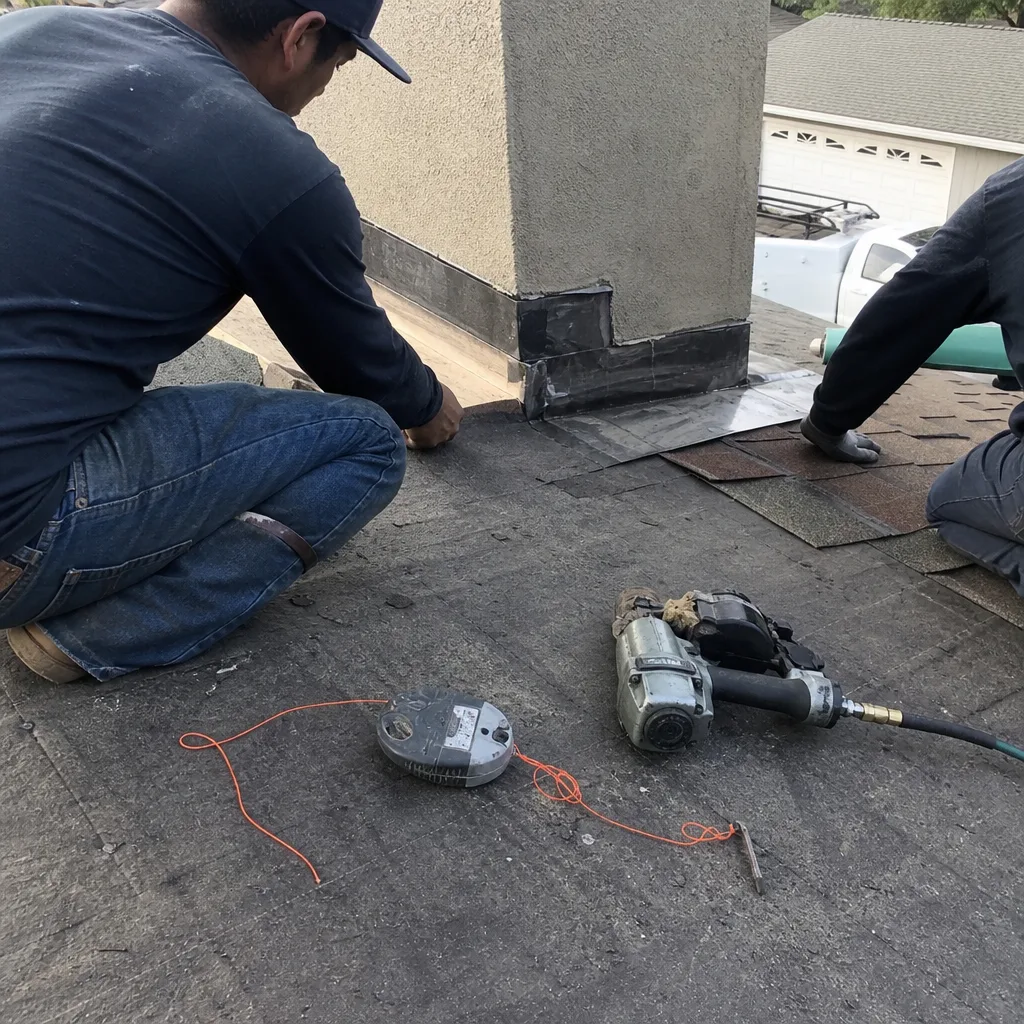
Flashing is the thin metal, usually galvanized steel or aluminum, that seals the joints where the roof meets a vertical surface: chimney, skylight, vent pipe, or wall. The metal expands and contracts with San Jose’s temperature swings, which can exceed 40 degrees between a summer afternoon and a winter morning. Over decades, that movement cracks the metal or breaks the sealant at the joint. Look for cracked caulk around the base of vent pipes, flashing that has lifted away from the chimney brick, or step flashing along a wall that has started to peel back. These are the most common source of otherwise unexplained leaks in homes we inspect around Willow Glen, Cambrian, and Evergreen.
Missing Shingles or Lifted Tabs
A single missing shingle after a winter wind storm is not an emergency, but it’s not something to let ride through the next rainy season. The exposed area is now protected only by underlayment, which is a water-resistant barrier, not a waterproof one. Underlayment degrades rapidly under direct UV exposure. If you can see shiny felt or synthetic underlayment showing through where a shingle used to be, you have weeks, not months, to replace it. The same applies to shingle tabs that have lifted but not detached: the seal strip that bonds the tab to the course below loses adhesion with age and thermal cycling. A lifted tab is a wind catch. The next storm will peel it back and start stripping the course.
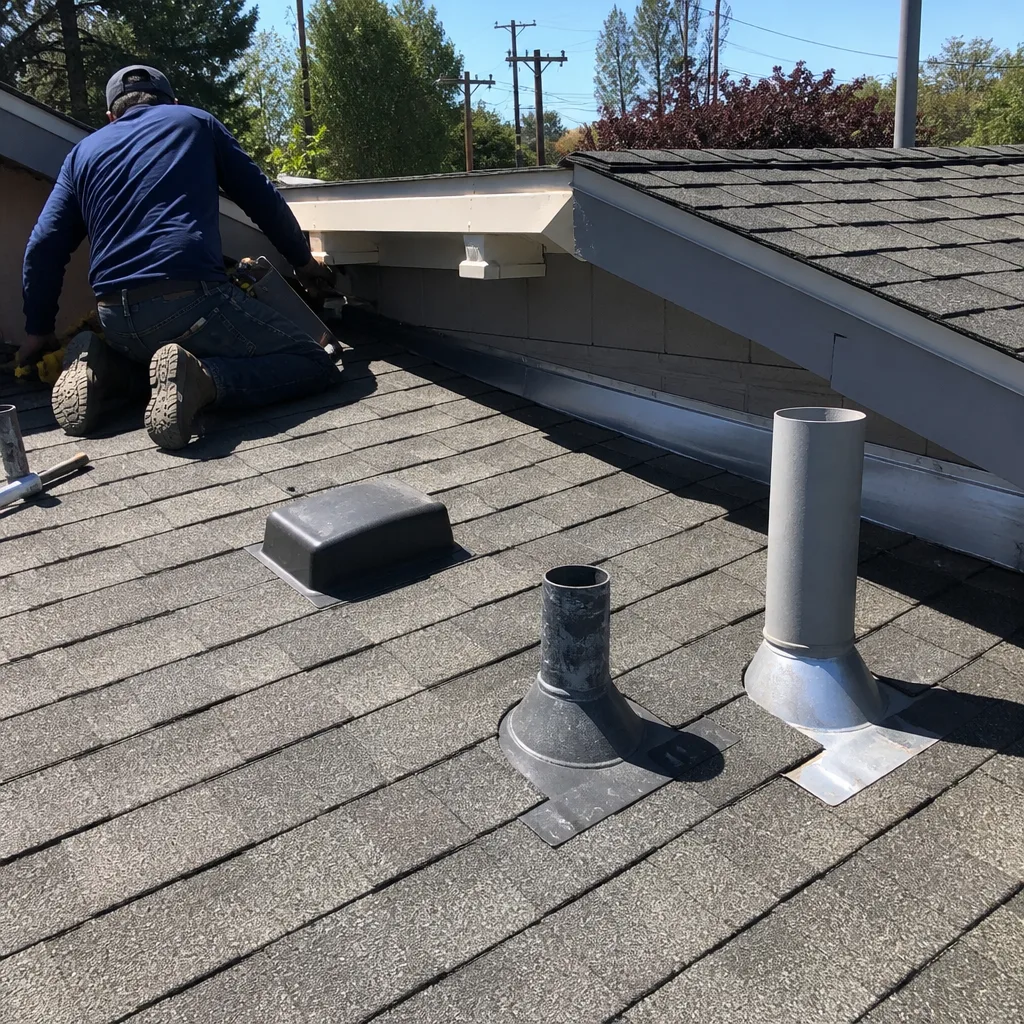
Failing Caulk at Vent Pipes and HVAC Penetrations
San Jose homes rely heavily on rooftop HVAC units and swamp coolers, which means more roof penetrations than a typical roof plan. Every penetration is a potential leak point, and the caulk or rubber boot sealing those penetrations is the first thing to fail. Rubber boot seals dry out and crack in Silicon Valley’s hot, dry summers, typically failing within 10 to 15 years of installation. Look for cracked, hardened, or missing caulk around pipe collars. If the rubber boot around a vent stack has gaping cracks, it’s a Tier 2 repair, and one that’s inexpensive now and expensive later.
Rust and Corrosion on Metal Flashings
In a dry climate, rust on flashing is slower to develop than in coastal air, but older galvanized flashing eventually surrenders to oxidation. Surface rust is a monitor item. Pitting, scaling, or actual holes in the flashing are functional failures. The metal can no longer redirect water. Replace it.
Tier 3: Structural Signals That Require a Call Today
These are the signals that separate a repair from a replacement, and a $500 fix from a $10,000 one. Structural signs mean water has already entered the roof assembly, or the framing is no longer carrying its load correctly. Time is working against you in a compounding way.
Sagging or Spongy Decking
The deck, or decking, is the sheet material, usually plywood or OSB, that sits on top of the rafters and under the shingles. When water reaches the decking and sits against it, the wood absorbs moisture, loses its shear strength, and begins to deflect between rafters. From inside an unfinished attic, this looks like visible dip or wave across the roof plane. From the roof surface, it can feel spongy or bouncy underfoot. A sagging deck means a water path already exists and wood is already compromised. This is a call-today signal. In our work across San Jose, we regularly see sagging decking around failed chimney flashing or vent pipe boots that went unnoticed through an entire wet season.
Water Flow Through the Ceiling
A dark stain is evidence of prior water entry. Water actively running down a wall or dripping from a ceiling fixture is evidence of current entry. The distinction matters. A stain that has dried and shown no growth in size for months tells you the leak was intermittent and may have self-sealed. Water running during a rain event tells you the roof’s water-shedding system has failed at that moment. Kill the power to any affected circuit if water is near a fixture, move anything that can absorb water out of the path, and place a bucket under the drip. Then call. Active water flow through the ceiling is not a schedule-for-next-week item.
Pronounced Ridge Line Dip
Stand across the street from your home and sight the ridge line. A healthy ridge is straight. A pronounced dip or wave along the ridge, especially mid-span, is a structural warning sign that is almost always missed until a roofer points it out. It can indicate ridge beam deflection, settling of the bearing walls, or long-term water damage to the ridge structure itself. Not every dip is an emergency: many older San Jose homes have subtle framing irregularities that were built in from day one. But a dip that is visible from the street, or one that has appeared or deepened within a few years, warrants a structural assessment sooner rather than later. This is one of the few warning signs where guessing wrong in the direction of “wait and see” can be costly.
Interior Water Stains That Widen During Rain
A stain you can date is a stain you can diagnose. If you’ve noticed a ceiling stain that visibly expands or darkens during active rain, that’s confirmation of an open water path, not just historical water intrusion. Mark the edge of the stain lightly with a pencil next time it’s dry, then check it during the next storm. Growth between pencil lines means an active leak. That’s a Tier 3 signal.
San Jose-Specific Warning Signs Most Guides Miss
Generic roofing guides are written for a national audience, which means they miss the signs that show up in a Mediterranean-style climate with dry summers, concentrated winter rain, and the occasional hard frost in the hills. Here are the San Jose-specific indicators we see most often.
Efflorescence on Chimney Brick After Dry Spells
Efflorescence is the white, chalky residue that forms on masonry surfaces, including chimney brick. It’s a mineral deposit left behind when water that has penetrated the brick’s surface evaporates back out, carrying dissolved salts from inside the masonry. In San Jose, where summers are long and rain is concentrated in a few winter months, efflorescence appears most visibly after dry spells, when the evaporation cycle is strongest. It’s a sign that water is migrating through the chimney structure. On its own, efflorescence doesn’t mean your roof is leaking, but it does mean the chimney’s water-shedding system, usually the flashing cap or the masonry sealant, is letting water into the brick. Left unaddressed, that water expands when the temperatures dip into freezing ranges in the hills around Silver Creek and Evergreen, slowly spalling the brick face. If you see fresh efflorescence appearing each year, schedule a chimney flashing inspection before the next wet season.
Flashing Separation Around HVAC Penetrations
San Jose has one of the highest rooftop HVAC penetration densities among major California cities. A typical 1960s ranch in the Cambrian area might have a rooftop AC unit, a swamp cooler penetration that was abandoned in the 1980s, and a bathroom vent stack, all within ten feet of each other. Each of those penetrations has a flashing and sealant assembly that degrades with San Jose’s thermal cycling. The specific sign to look for is flashing that has lifted away from the penetration pipe or housing, or sealant that has cracked in a radial pattern around the base. This is a Tier 2 failure you can spot from the ground with binoculars.
Ridge Line Dip Visible from the Street
We covered this under structural signals, but it’s worth repeating here with local context. San Jose’s older housing stock, much of it built in the 1950s through 1970s, was framed with the lumber sizing standards of that era. Some older roofs were built to just barely meet the load specs of the day, and decades of thermal cycling plus the occasional wet winter take a toll. A dip in a ridge line on a 1950s ranch in Willow Glen or a 1960s tract home in Berryessa is not the same as a ridge dip on a newer build, because the older framing has less reserve capacity. If your home is pre-1980 and you can see a ridge dip from the street, have a structural contractor look at it, not just a roofer.
Interior Warning Signs That Appear Before Ceiling Stains
By the time a ceiling stain appears, water has traveled through the decking, soaked into the insulation, and migrated along a rafter or a top plate to find an opening. The stain is the last stop on that journey, not the first. Here’s what shows up sooner, if you’re looking.
Attic Condensation on the Underside of Decking
In San Jose’s winter, warm, moist air from the living space rises into the attic. If attic ventilation is inadequate, that warm air reaches the cold underside of the roof deck and condenses. You’ll see small water droplets beading on the decking, or a shiny, damp sheen across the underside of the roof plane on cold mornings. This is a ventilation problem, not a leak, and it’s often misdiagnosed as a roof failure. The fix is additional intake or exhaust ventilation, not shingle work. The warning sign matters because prolonged condensation soaks the decking from below, creating the same wood decay conditions as a leak, without any water ever having touched the shingle surface.
Rafter Staining and Darkening
Look at the rafters in your attic, especially the tops where they meet the decking. Rafters that are uniformly the color of dry, seasoned lumber are fine. Rafters with dark, streaked, or blotchy staining, especially in a pattern that follows a specific angle or water path, are a sign of past or present water travel along the framing member. This is water that has entered the roof assembly and run along the framing before evaporating. The stain tells you where the water went. The entry point is often directly above the top of the stain, but water can travel surprisingly far along a rafter before it finds a vertical path down.
Insulation Compression and Matting
Insulation in an attic should be lofted, dry, and fluffy. If you run your hand across the insulation and find areas that feel compressed, matted down, or crusty, that’s the residue of water that has soaked the insulation and dried, or soaked it and never dried. Compression from water damage permanently reduces the insulation’s R-value, which means your heating and cooling costs climb in direct proportion to the amount of insulation you’ve lost. Crusty or matted insulation is a strong indicator of a chronic, slow leak that never produced a dramatic stain, the kind of leak that seeps a little water through during each rain event and then dries out completely during San Jose’s long dry season. The insulation is the record keeper. Listen to it.
How to Document Roof Warning Signs for Insurance and Estimates
The quality of your documentation determines how seriously the next person takes your report. An insurance adjuster looking at five blurry photos and a verbal description is making a judgment call with incomplete information. A contractor preparing an estimate is doing the same. Here’s how to document what you’re seeing so the next step is based on evidence, not interpretation.
- Photograph the sign from at least three distances. One wide shot that shows the context of the sign on the roof or ceiling. One mid shot that shows the full extent of the area. One close shot that shows the surface texture or detail. This progression lets the viewer place the problem accurately.
- Include a reference object for scale in every close shot. A coin, a tape measure, a pencil, anything with a known size. A photo of a water stain with no reference object is impossible to size. A photo of a stain with a quarter next to it tells the whole story.
- Photograph the same sign on two separate days. One during or immediately after a rain event, and one during a dry period. This creates a visual record of whether the sign is changing with weather conditions, which is essential for distinguishing active leaks from historical staining.
- Turn on the metadata stamps on your phone. Date, time, and GPS location embedded in the photo file create an audit trail that an insurance adjuster can use to place the photo at your property on a specific date. Turn off the metadata and the photo is just a photo.
- Write a one-sentence dated note for each sign. “Dark stain on master bedroom ceiling, 6 inches across, appeared after the January 23 storm.” Or “Ridge line dip visible from the street, first noticed February 2026.” Date each note. The note plus the photo is a documentation package that beats a dozen verbal descriptions.
- Keep a running maintenance log. A simple spreadsheet or notebook page with column headers for date, sign, location, and action taken. This log becomes the most valuable document you’ll have when you eventually sell the home, file a claim, or prepare for a roof replacement.
Signs Contractors Sometimes Use to Oversell
Not every warning sign is a warning. Some are simply the normal signatures of an aging roof that a less scrupulous contractor might present as an urgent reason for a full replacement. Here’s what three of the most commonly misrepresented signs actually mean.
Granule Accumulation in Gutters
You’ll sometimes hear a salesperson scoop a handful of granules out of a gutter and hold them up like evidence of imminent roof failure. That’s a misrepresentation. Asphalt shingles shed granules continuously throughout their life. A new GAF or CertainTeed shingle roof will shed a visible amount of granules in the first year as manufacturing residue and loose surface granules wash off. The quantity matters, not the presence. A thin line of granules along the gutter is normal. A layer thick enough to fill the gutter channel is a sign the shingle field is near the end of its functional life. And even then, it’s a monitoring signal, not an emergency replacement trigger. Have someone look at the shingle surface itself, not the gutter contents, before making a replacement decision.
Minor Moss Presence
A few patches of moss on a shaded north-facing slope is sometimes presented as a sign the roof is failing. Moss holds moisture against the shingle, which shortens the shingle’s life on that slope, but it’s a maintenance issue, not a structural one. Moss can be brushed off or treated with the appropriate zinc-based preventive. The slope may eventually need a repair, but a contractor who points at a patch of moss and recommends a full roof replacement is overselling. We’ve seen moss patches on roofs that were otherwise healthy and went on to serve another ten years with proper slope maintenance.
First-Coat Oxidation on Metal Roofs
On metal roofing, particularly older standing seam roofs across San Jose’s mid-century neighborhoods, the paint system oxidizes with age. The surface takes on a chalky appearance, and color fades. Some roofing companies present this as “your metal roof is failing.” The metal isn’t failing. The paint system has reached the end of its cosmetic life, but the metal’s structural and water-shedding functions are intact. A metal roof with chalky oxidation may have a decade or more of functional life remaining. Recoating is an option. Replacement is a choice, not a necessity. If someone is pushing replacement based on surface oxidation alone, get a second opinion from someone familiar with metal roofing in San Jose’s climate.
Common Mistakes to Avoid
- Treating every warning sign as an emergency. Not all signals mean “call today.” Granule loss in a gutter and a visible ridge dip are both called warning signs but carry completely different urgency. Misclassifying a cosmetic sign as an emergency sends you into a roof decision without adequate time to get competing estimates or understand the full scope.
- Ignoring interior signs because the ceiling looks fine. Attic condensation, rafter staining, and insulation compression are the early-warning system for your roof. In many San Jose homes, these signs appear one to two wet seasons before water ever reaches the ceiling drywall. Checking your attic once per year, ideally in late fall before the rains return, catches these before they become ceiling stains.
- Relying on a single photo from the ground. A roof inspection from the ground misses the interior decking, the flashing details, the underlayment condition, and most of the signs that actually matter. Ground-level photos are useful for documenting ridge lines, but they’re not a substitute for an on-roof or attic inspection.
- Waiting until the wet season to schedule repairs. San Jose receives most of its annual rainfall between November and March. Contractors are at their busiest from October through January, and scheduling a repair mid-storm means waiting behind everyone else with the same problem. Scheduling a Tier 2 repair in August or September gets it done before the first rain arrives.
- Not reading the guarantee language before signing. A guarantee is only as good as its written terms. Before any repair work starts, ask for the specific language: what’s covered, for how long, and what happens if the repair fails. A contractor who won’t put the specific terms in writing is telling you something about how they’ll respond if the repair doesn’t hold.
- Confusing water stains with condensation marks. A ring-shaped stain near a bathroom vent or a ceiling stain that never grows after the initial appearance may be a one-time condensation event, not an active leak. Before you call for a repair, take the dated-photo approach described above and track whether the stain changes with weather. That evidence tells you much more than a single snapshot will.
When to Call a Professional
You’ve now got the framework to sort roofing warning signs into three tiers, and the documentation steps to gather evidence. The question that remains-one we explore in our DIY vs Professional Roofing: The San Jose Homeowner’s Decision Guide-is: at what point does the homeowner hand the problem to a professional? Here’s the short answer. Call when you’ve identified a Tier 2 or Tier 3 sign, when you’ve completed the documentation steps and the sign persists or worsens, or when you can’t safely access the area yourself. Some signs, like ridge line dip, sagging decking, or active water flow, should never be self-assessed from a ladder. Tilehurst Roofing San Jose offers free estimates in San Jose, and a written price is always in your hands before any work starts. Call (669) 274-0078 to schedule your inspection.
Frequently Asked Questions
Most asphalt shingle roof repairs in San Jose run between $350 and $900, depending on the scope, the accessibility of the roof, and the specific materials involved. Minor flashing replacement typically falls in the $350 to $600 range. Larger scopes, like replacing a section of decking or repairing water damage to the roof assembly, can run $1,200 to $4,000 or more depending on how much wood needs replacement. Call (669) 274-0078 for an exact written quote. Estimates are free.
It depends on the tier. Tier 1 cosmetic signs can be monitored for months or even years without risk. Tier 2 functional failures should be scheduled within 30 days in San Jose’s climate. Tier 3 structural signals warrant a call that same day. The difference between Tier 2 and Tier 3 is simply whether water has found a path into the roof assembly, and the only way to know for sure is to have someone look at the roof system itself.
From inside an unfinished attic, a sagging roof deck typically appears as a visible dip or wave across the roof plane, often most noticeable along the rafter lines. The sag may be subtle, appearing as a shallow depression between rafters rather than a dramatic droop. Spongy or deflected decking when you apply gentle hand pressure is another tell. In the attic, sagging decking is usually accompanied by rafter staining or insulation compression in the same area, because the sag and the water damage share a common cause.
In San Jose, most minor roof repairs, such as replacing individual shingles or re-sealing flashing, do not require a building permit. Larger scopes, including partial re-roofing, full roof replacement, or structural repairs to the decking or framing, typically require a permit from the City of San Jose’s Building Division. The permitting requirement depends on the scope of work, so it’s worth asking your contractor before work starts whether a permit is needed. A roofing company in San Jose that routinely handles local work should know the current threshold and pull the permit when required.
Efflorescence is a mineral deposit, typically white, chalky, or crystalline, that forms when water migrating through masonry evaporates and leaves behind dissolved salts. It’s brittle and often wipes away with light brushing. Mold, by contrast, is organic, usually darker in color, and feels soft or fuzzy to the touch. Efflorescence signals a moisture path through the chimney, which a flashing inspection can address. Mold indicates a moisture and an organic food source, usually in the same area, and both should be evaluated by a professional.
Insurance typically covers sudden, accidental damage, not maintenance failure. If a roof leak develops because flashing cracked and you never addressed it, the resulting interior damage may be excluded from coverage on the basis of negligence or wear-and-tear exclusions. This is one reason the documentation steps matter: a dated, photographed record of when you first noticed a sign creates a timeline that can be useful in the claims process. Coverage depends entirely on the specific policy language, so check with your agent or adjuster for details. The Tilehurst Roofing San Jose home page covers this in more detail.
The Bottom Line
Roofing warning signs aren’t all created equal, and the difference between a $500 repair and a $10,000 roof replacement is usually a matter of reading the signal early enough and acting with the right urgency. San Jose’s dry summers and concentrated winter rains create a specific pattern of roofing failures: components like flashing and vent boots dry out and crack through the long hot season, then leak during the first heavy storm. The homeowners who catch those failures at the Tier 2 stage are the ones who avoid the Tier 3 structural damage. Check your attic annually. Document what you see. Sort the signal into the right tier. And when a sign warrants a professional look, get a written price before any work starts. For more guides & resources on protecting your San Jose home, explore our blog.
Written by Greg Holloway, Owner at Tilehurst Roofing San Jose, serving San Jose since 2000.
See the difference
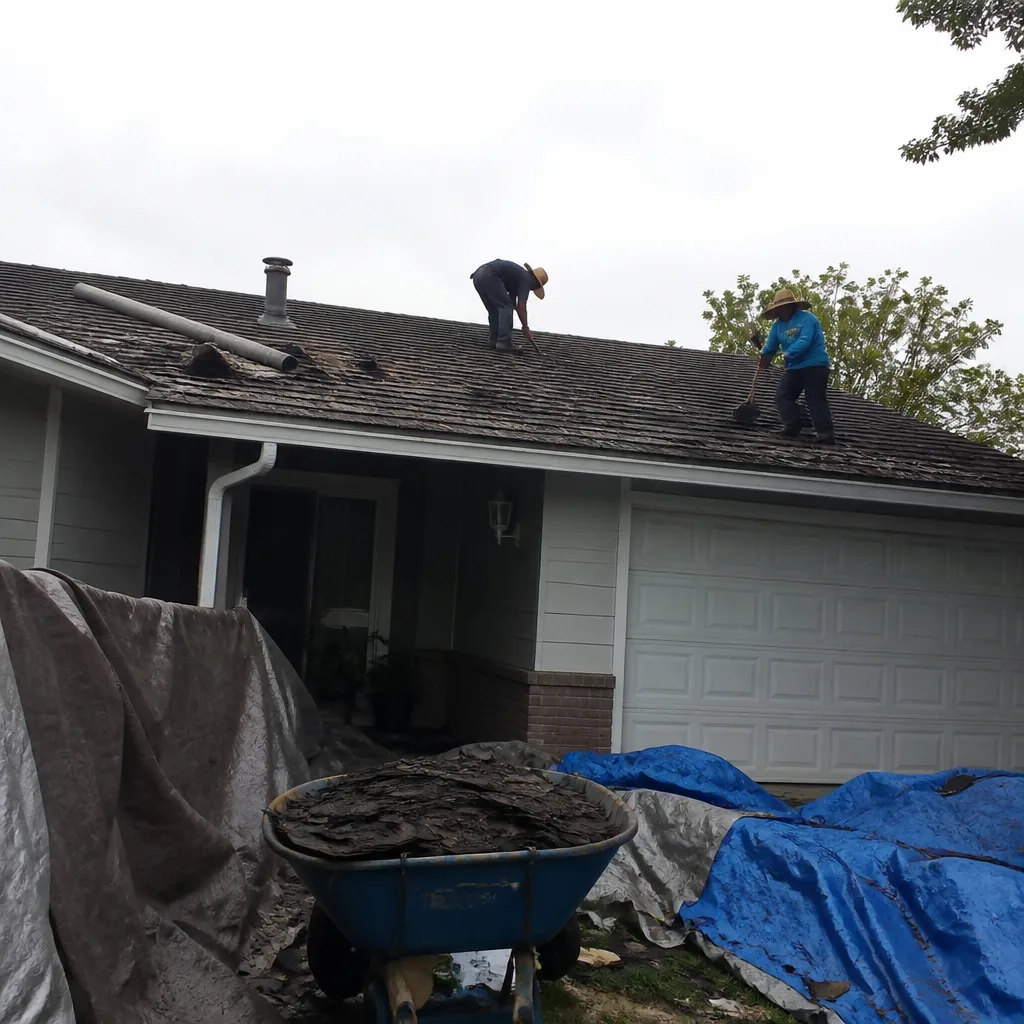 Before
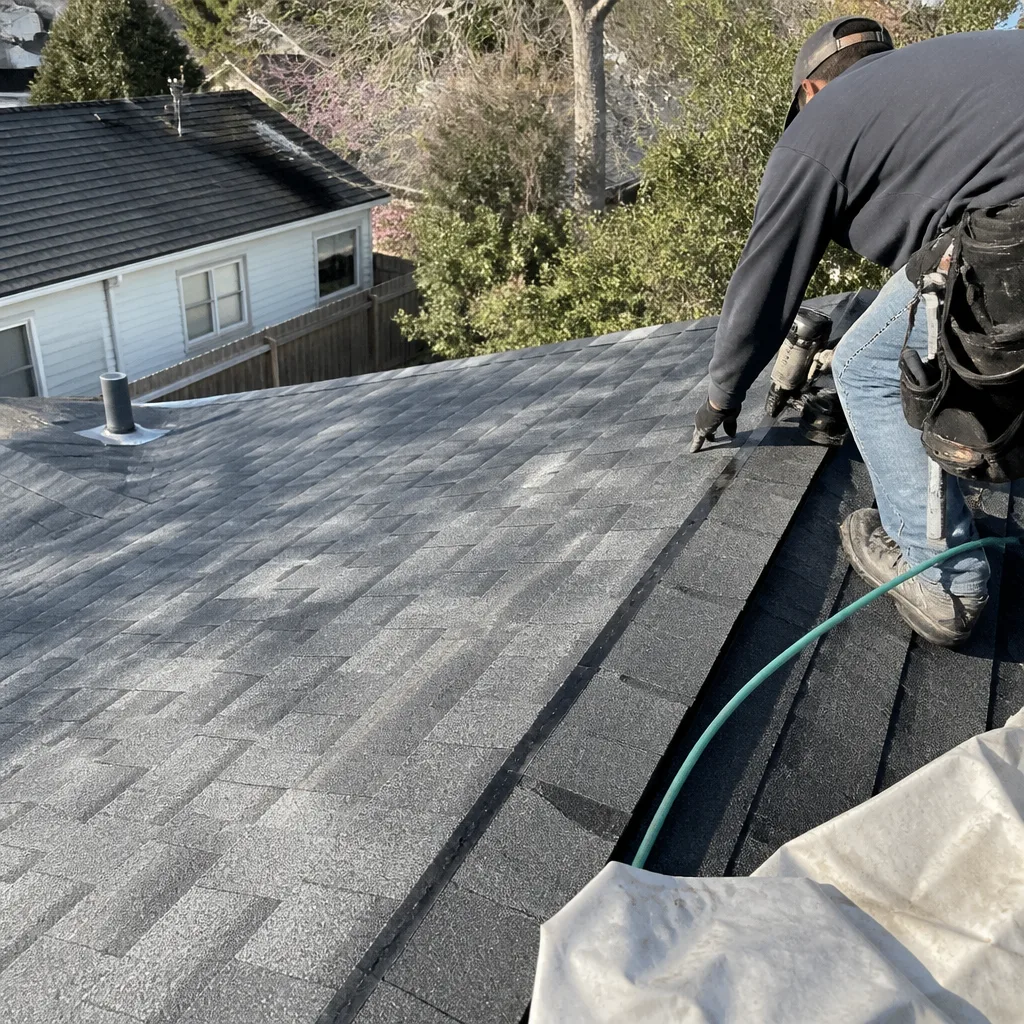 After
After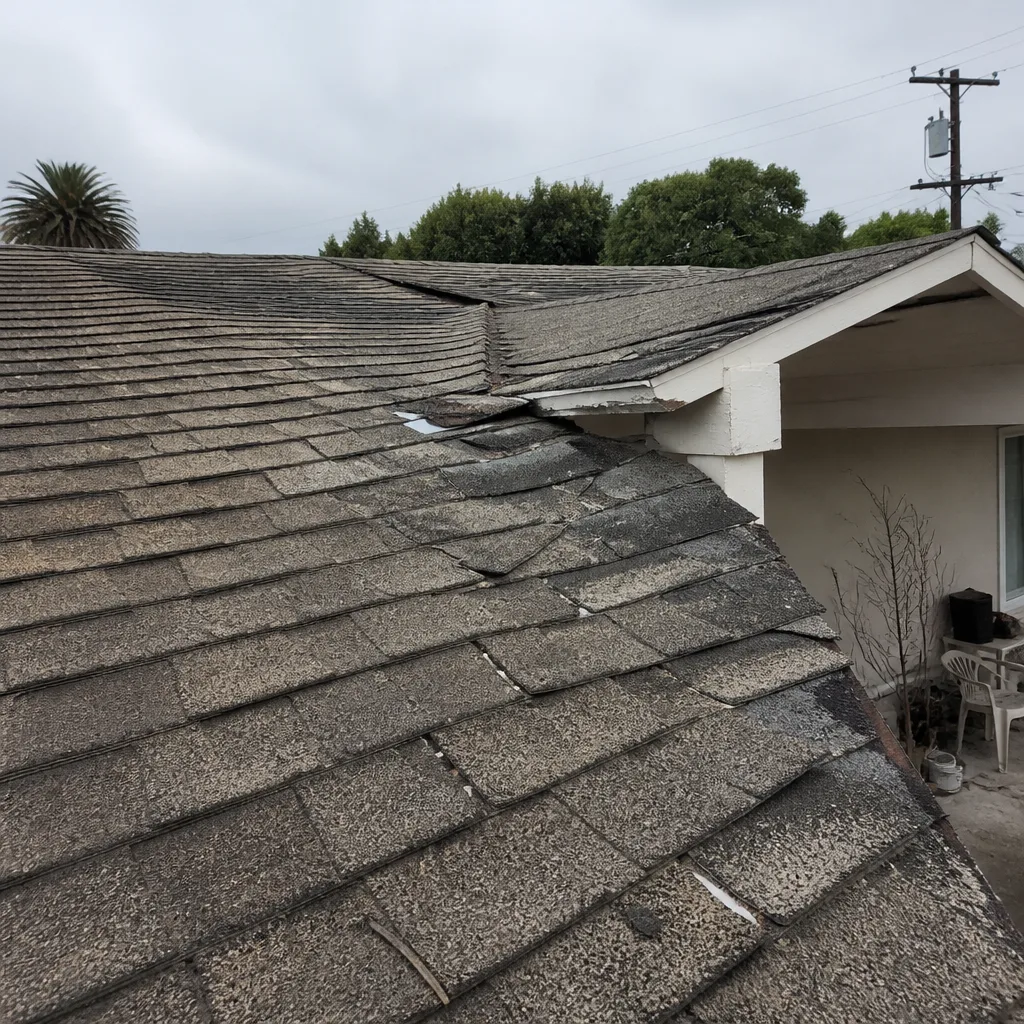 Before
 After
After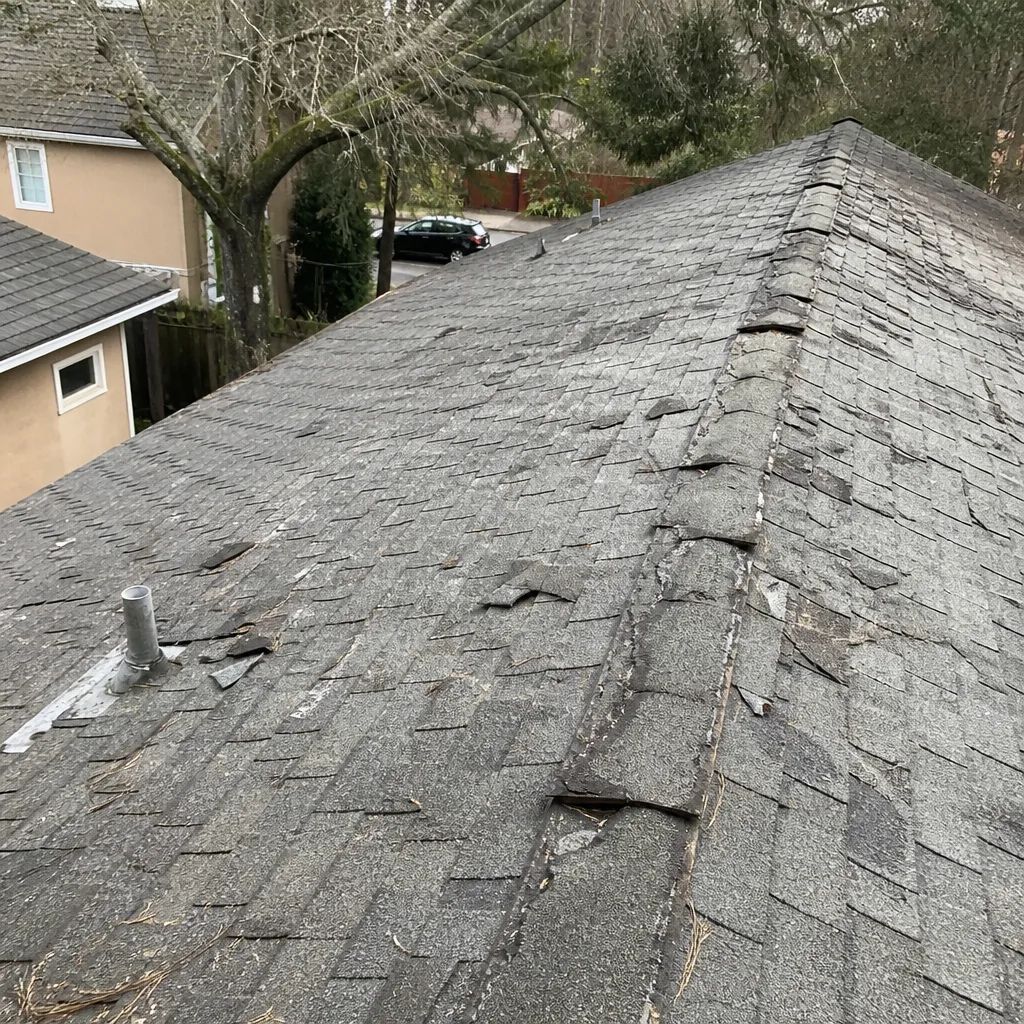 Before
 After
After